
In the world of high-end jewelry manufacturing, a “shiny” surface is standard, but a 100% mirror finish is a signature of elite craftsmanship. Often referred to as a “black finish” in luxury watchmaking and fine jewelry, this level of polish creates a surface so perfectly flat that it reflects light without distortion.
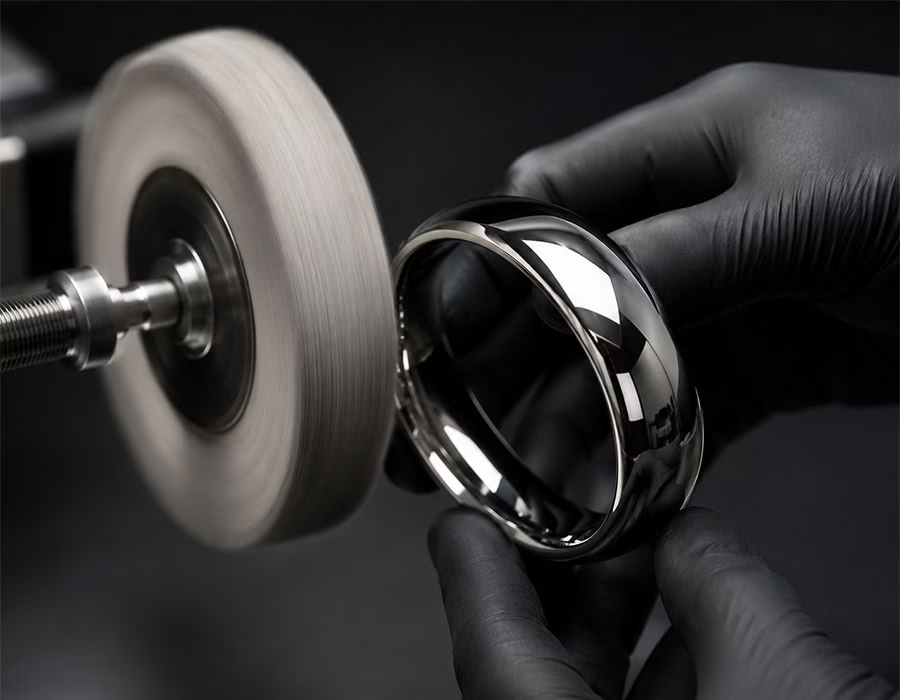
Achieving this result requires a disciplined, multi-stage physical process. This technical guide breaks down the professional workflow for transforming raw metal into a nanometer-scale reflective masterpiece.
What Defines a True Mirror Finish?
A 100% mirror finish is achieved when the surface roughness ($Ra$) is reduced to a point where light waves reflect in total unison. To the naked eye, the metal should act exactly like a glass mirror. If you hold a black card against the piece, the reflection should be crisp, dark, and clear, with no “haze” or “milkiness.”
The Professional Workflow: Step-by-Step
1. Surface Assessment & Pre-Finishing
Every masterpiece begins with a critical inspection. Before polishing, the piece must be structurally perfect.
- Refinement: Use high-precision Swiss Vallorbe files (#00 to #6) to remove casting seams, sprue marks, and deep scratches.
- Integrity Check: Inspect under 10x magnification. Any pit or porosity left at this stage will only become more visible once the piece is shiny.
2. Systematic Surface Leveling (The Grit Sequence)
This is the most critical stage. You are not “cleaning” the metal; you are systematically replacing deep scratches with microscopic ones.
- The Sequence: 400 → 800 → 1500 → 3000 → 5000 grit.
- The 90-Degree Rule: Always rotate your sanding direction by 90 degrees when switching to a higher grit. This allows you to visually confirm that the previous grit’s scratches have been entirely erased.
3. Initial Cutting & Compounding
This stage uses mechanical force and abrasive compounds to transition from a matte surface to a reflective one.
- Materials: Use a stiff felt bob or a stitched muslin wheel with Tripoli (Brown) or a medium cutting compound.
- Technique: Maintain a consistent RPM (usually 3,000–5,000). Keep the piece moving constantly to prevent “flat spots” or “orange peel” textures caused by overheating the metal.
4. Final Clarity & Buffing
The final stage focuses on molecular-level leveling.
- Diamond Pastes: For the ultimate finish, professionals use Diamond Polishing Pastes (6-micron, 3-micron, and finally 1-micron).
- Final Buff: Use a loose-fold flannel wheel or a fine cotton puff with Jeweler’s Rouge (Red for gold, White/Green for steel and platinum).
- Detailing: For hard-to-reach areas, use polishing threads or miniature brushes to ensure the internal surfaces match the exterior luster.
Technical Reference Table
| Metal Type | Polishing Challenge | Recommended Compound | Final Goal |
| 316L Stainless Steel | High Surface Hardness | Green Chrome / Diamond Paste | Sharp, “Cold” Reflection |
| 14K / 18K Gold | High Ductility (Soft) | Red Rouge / Sakura Pink | Deep, Warm Glow |
| Platinum / Titanium | Heat Sensitivity | Specialized Platinum Blue | Zero Haze / Zero Drag |
Pro-Tips for Quality Control
- Contamination Management: This is the #1 rule. One wheel, one compound. If a single grain of 400-grit sand gets onto your final 1-micron buffing wheel, it will leave permanent micro-scratches (hairlines). Store wheels in separate, labeled bags.
- Heat Control: Excessive friction can “burn” the polishing compound into the metal. Use light pressure and intermittent cycles.
- Ultrasonic Final Cleaning: Once polished, the piece must be cleaned in an ultrasonic tank at 60°C with a de-waxing solution. This removes all residual fats and oils, revealing the true mirror surface.
Frequently Asked Questions
Q: Why does my jewelry look “cloudy” after the final buff?
A: This “haze” usually means the previous sanding marks were not fully removed. You cannot buff out a 1200-grit scratch with rouge; you must go back to the sanding stage.
Q: Does polishing remove weight from the jewelry?
A: Yes. Polishing is a subtractive process. However, a professional who follows the grit sequence correctly minimizes metal loss by ensuring each stage is as efficient as possible.
Q: How do I check for a 100% finish?
A: Inspect the piece under a high-contrast LED white light against a dark background. If you see any “fuzziness” around the light bulb’s reflection, the surface is not yet a true mirror.
Conclusion
Achieving a 100% mirror finish is a test of patience. The quality of the final shine is 90% preparation and 10% buffing. By following a strict, multi-stage protocol, you ensure that every piece leaving your bench meets the highest standards of luxury and precision.

With over 10 years of experience in the stainless steel jewelry industry, Lydia Ling brings deep industry knowledge and hands-on market expertise to her role. As an accomplished Sales Manager, she has a strong understanding of product development, manufacturing processes, and global customer needs. Through the company blog, Lydia shares practical insights and industry know-how to help readers better understand stainless steel jewelry and make informed business decisions.